Reactivity Tutorial for Vue 3 - Data and Component State for Beginners
written by... Brian Driscoll | Date: March 24, 2023
What are reactive variables?
They are variables that, when changes occur, trigger a rerender so you can see the result of that change in the browser.
In Vue 3’s composition API, we have 2 ways to create reactive variables, by using ref or reactive. Having 2 ways to do this can often be confusing at first. Which one should you use and why? In this article, we explain how to use both and give you a framework for knowing when to use them.
What you will learn...
As always, you can watch the video, read the article, or use both!
Basic Rules for Using Ref
This is the first way to create reactive variables in your Vue application. A good rule of thumb when working with reactivity:
- Always use ref unless you have a need to use reactive.
Ref is simple and straightforward and will allow you to accomplish a lot without confusing you.
Let’s start by creating a basic single page component:
<template> <main> <h1> {{ title }} </h1> </main></template><script setup>let title = "Reactivity Explained";</script>We establish the variable title and give it the string value “Reactivity Explained”.
In the template we call the title variable using mustache syntax {{ }}. Run your application and Reactivity Explained will output to the screen.
Now we want to change this title while the program is running. We are going to add a button and a function called changeTitle.
<template> <main> <h1> {{ title }} </h1> <button @click="changeTitle"> Change Title </button> </main></template><script setup>let title = "Reactivity Explained";function changeTitle() { title = "Reactivity Works"; console.log(title);}</script>The button has a click handler that calls the changeTitle method. In the changeTitle method, we change the value of title and log it to the console.
When you click the button, 2 things happen:
- The title variable’s value changes as noted on the console but…
- The title on the screen stays the same.
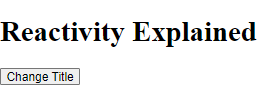
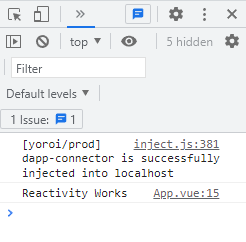
So why does the variable change but browser output stays the same?
There is no reactivity so when the variable changes, a rerender does not occur.
Let’s add some reactivity using ref!
<template> <main> <h1> {{ title }} </h1> <button @click="changeTitle"> Change Title </button> </main></template><script setup>import { ref } from "vue"; //import reflet title = ref("Reactivity Explained"); // wrap value with reffunction changeTitle() { title.value = "Reactivity Works"; //use .value syntax}</script>We made 3 changes to add reactivity with ref:
- Import ref from Vue.
- Wrap the variable value with a ref and parentheses.
- Change the value of the ref variable with .value syntax in the changeTitle function.
By wrapping the value with a ref, we tell Vue that this variable is reactive. To change a ref value, we have to call .value to access its contents. At first this maybe a little confusing, but there is a benefit to this syntax.
When using .value syntax, it makes it explicit that we are changing a reactive state value and triggering a rerender. Also notice how the template does not use the .value syntax. The template will automatically unwrap your ref value for you.
Now you will notice that the title on the browser changes whenever you click the button.
Conditionally Toggle Elements With Ref
Another great way to use ref variables is to conditionally render elements to the screen. In this case we are going to toggle elements.
To achieve this, we are going to use v-if statements (Vue) and a ternary operator (JavaScript):
<template> <main> // v-if directives toggle titles based on truthy value <h1 v-if="isInPool"> You are in the pool! </h1> //prints when true <h1 v-if="!isInPool"> You are waiting to jump... </h1> //prints when false //Button binded to "jump" method //Button text based on ternary operator truthy result <button @click="jump"> {{ isInPool ? "Get out of pool": "Jump into the pool" }} </button> </main></template><script setup>import { ref } from "vue";let isInPool = ref(false);//toggle truthy (true or false)function jump() { isInPool.value = !isInPool.value;}</script><style scoped>In the template we have 2 <h1> tags. Inside them are two v-if directives. If the value in the v-if matches the ref variables value, then it will print out. You will notice we made one set to true and the other set to false.
The button is binded to the jump function. And the text within the button prints out based on the truthyness value of isInPool.
So when the jump function is called, it takes the value of isInPool and sets it to the opposite value. That means if isInPool is equal to true, set it to false, and vice versa.
When isInPool is true, the browser will print:
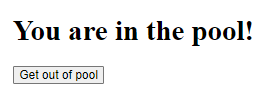
When isInPool is false:, the browser will print:

Ref is a great way to add reactivity and is very powerful. It is also explicit and makes it easy to understand what is going on within your template.
The one thing that may confuse people at first is the .value syntax. When running logic on your ref variables within the script, you will usually have to use this syntax. But there are cases where the .value syntax is not needed, such as when the ref value is in your template.
But for simplicity, use .value when using the ref value in your script and don’t use it within your template. There will be edge cases when this rule doesn’t apply, but you will learn that with experience.
Now we will talk about Vue 3’s other way for adding reactivity!
Basic Rules for Reactive
Reactive variables have some major differences from their ref counterpart:
- Only accepts and object, unlike ref which can accept any data type
- You cannot replace the object because it will lose reactivity
- You can only change properties within a reactive variable to maintain reactivity
For example:
let person = reactive({ name: “John”, age: 50})Notice that between the parentheses is an object and the object has properties with values.
Now let’s try to change the object:
let person = reactive({ name: “John”, age: 50})person = { name: “Ryan”, age: 20 };This may seem like it would work, but unfortunately we would lose reactivity. We can’t replace the object. We can only change properties WITHIN the object.
person.name = “ryan”;person.age = 20;Now that we have that out of the way, let’s start with some examples.
Print out a List With Reactive
So here we have a reactive object that contains an employee’s information. Let’s go ahead and print this out to our template using a v-for loop:
<template> <main> <h1> Title </h1> <ul > <li v-for="(item, name) in employee" :key="name"> {{ name }}: {{ item }} </li> </ul> </main></template><script setup>import { reactive } from "vue";let employee = reactive({ name: "Sheila", birthdate: "08/20/2000", salary: 62000, department: "marketing", position: "Social Media Manager"})</script>In our v-for loop, we ask for both the item and name of the property. To do this, we explicitly label name as our key and bind it.
What is happening exactly?
We are telling Vue that we want both the property names (name) and the property values (item) from the reactive object we are printing out. We also let Vue know that the name will be used as a key for identification.
Just like how in an array the key is the position: position 0, position 1, etc. In an object, instead of a position number, we establish position by using the property names. In this case: name, birthdate, salary, department, and position.
Now that we understand how the v-for loop is printing out the data, let’s relate this to a more real use case.
Using Reactive with Data
Let’s say we are trying to fetch data from a database. In this database, we have a list of employees. To make this simple for us, we are going to skip the whole fetching part as that is a different lesson.
Instead, we will write out an example object to represent data that we would fetch.
And after we have fetched this data, we will assign it to our reactive variable, employee.
<template> <main> <h1> Title </h1> <ul > <li v-for="(item, name) in employee" :key="name"> {{ name }}: {{ item }}</li> </ul> </main></template><script setup>import { reactive } from "vue";//Example of fetched data//An array of objectslet allEmployees = [ { name: "Sheila", birthdate: "08/20/2000", salary: 62000, department: "marketing", position: "Social Media Manager" }, { name: "Bob", birthdate: "08/20/2002", salary: 52000, department: "customer service", position: "Customer Rep" }];//Assign the 1st object from allEmployeeslet employee = reactive(allEmployees[0])</script>So now we have a variable called allEmployees. We assign the first employee object to our reactive variable, employee.
The same information from Sheila will print out to the template.

What we want to do is switch this information to Bob.
First, add a button to the template so we can have something to click and call a method from.
<button @click="changeEmployee"> Change Employee </button>Now let’s create the method changeEmployee. Someone new to Vue may try to change the information by changing the object:
function changeEmployee() { employee = allEmployees[1];}There is a problem with this.
We are not allowed to reassign a whole entire new object to the reactive variable. This mutation gets rid of our reactivity. If you console log employee with this method, you will see that employee DOES change, but it does not trigger a rerender.
In Vue, reactive objects are meant to be changed via the properties. This is allowed:
function changeEmployee() { employee.name = "Carella";}Because we access the property, our reactive object maintains reactivity and you will see “Sheila” replaced by “Carella” in the template.
But, we want ALL of these properties to be changed to the 2nd employee’s information. That’s where JavaScript’s built-in object methods come in handy:
function changeEmployee() { Object.assign(employee, allEmployees[1]);}We tell Vue that we want to take the reactive object of employee and replace all the property values with the property values of allEmployees1.
And wallah, our new employee’s information prints out.
To make sure you understand EXACTLY what object.assign is doing, it is very similar to how this version works:
function changeEmployee() { for (let name in employee) { employee[name] = allEmployees[1][name]; }}This for loop matches up the property names of each object and replaces the property value. The object version is much cleaner and easier to read, but they both achieve the same result.
One last thing!
To make sure you understand exactly how this works, remove a property from Bob:
let allEmployees = [ { name: "Sheila", birthdate: "08/20/2000", salary: 62000, department: "marketing", position: "Social Media Manager" }, { name: "Bob", birthdate: "08/20/2002", salary: 52000, department: "customer service" }];We removed Bob’s position. Click the button to trigger changeEmployee and you get this result:

Notice how all of the properties still exist. The difference is that the position of “Social Media Manager” stays the same. We are merely changing property values, not replacing them.
Using Ref and Reactive to Manage a Component State
Now that have used both ref and reactive, we are going to apply both of these reactivity fundamentals to manage component state.
In this application, we will:
- Use ref to track user input
- Use reactive to handle component state
- Use the value of the user input to decide on the component’s state
Let’s first create the basics of this application:
First, we create the input and use a directive called v-model. This directive connects the input to the userInput variable. We also have made the userInput variable a ref variable so that it is reactive. Now whatever we type into the input will automatically update the userInput variable.
Second, we create componentState using reactive. We set three state conditions: (1) inProgress, (2) error, (3) success. When the component mounts, it starts as in progress. Then, depending on the input, we will decide on the user state (which we have not done yet).
The last part are the p tags. We created 3 statements that will render to the page depending on the component’s state. Each one corresponds with either inProgress, error, or success.
Now we need to add a button and a method to create interactivity.
In the template:
<button @click="submitForm"> Submit form </button>In the script:
function submitForm() { console.log(userInput.value) if (userInput.value.length > 2) { componentState.inProgress = false; componentState.error = false; componentState.success = true; } else if (userInput.value.length <= 2 && userInput.value.length > 0) { componentState.inProgress = false; componentState.error = true; componentState.success = false; } else { componentState.inProgress = true; componentState.error = false; componentState.success = false; }}So now when we click the button, we validate the user’s input. It takes the userInput (updated using v-model), and uses an if-else statement to set 3 conditions:
- success condition: the string length is longer than 2 characters in length
- error condition: the string length is less then or equal to 2 AND greater than 0
- inProgress condition: when component is mounted and any other condition
Let’s also add some CSS to make the validation text more prominent:
<style scoped>.errorStatement { color: red;}.successStatement { color: green;}</style>Depending on the user’s input, we will see text based on the component’s state. This is a great way to add form validation to your forms. All you have to do is adjust the submitForm method to the conditions you want to set.
Conclusion
Reactivity in Vue 3 can be confusing, but ref and reactive have different use cases which allow us to create powerful, interactive applications. Using ref for most cases makes it simple to add reactivity to your application. And reactive makes it easy to logically group state or data information within an object.
If you found the article helpful, go to our free-course page and sign up. We will be releasing a full fundamentals course on Vue 3 soon, 100% free!


